 |
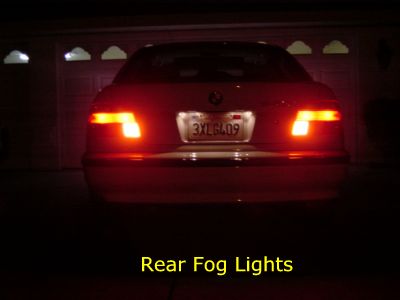 |
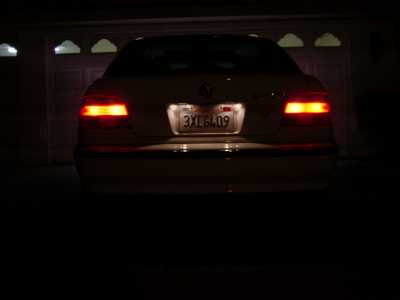
| Rear fog lights off | Rear fog lights on |
BMW Rear Fog Lights
Last Updated Jan '03
Background
Rear fog lights are useful in low visibility weather conditions such as dense fog, heavy rain, heavy snow, or smoke. Rear fog lights are a bright glowing orange color to allow cars behind you to see you with sufficient time to avoid a rear end collision. They should not be used in good weather conditions. Rear fog lights are standard on BMWs sold in Germany. Rear fog lights are legal in the US and some other European manufacturers equip US vehicles with them.
This page describes how to add rear fog lights to US and Canadian BMW E39's (528, 540, M5) with a build date prior to March 1999. Click here for a model year 2001 information.
So, take a look at what these things look like:
|
|
|
| Rear fog lights off | Rear fog lights on |
Preparation
This is a big project that requires a great deal of disassembly throughout the vehicle. Be prepared to spend a day or two to get it done. If you are not familiar with wiring or car disassembly, be sure to invite a friend to help out.
Tools needed:
BMW parts needed (about $70 USD):
Procedure
The project is divided into 3 phases: (1) preparing the rear fog lights, (2) fog light wiring and (3) fog light switch wiring.
Phase 1: Preparing the rear fog lights
This phase is fun and easy. It can be done independently of the rest and is a good warm up for what lies ahead.
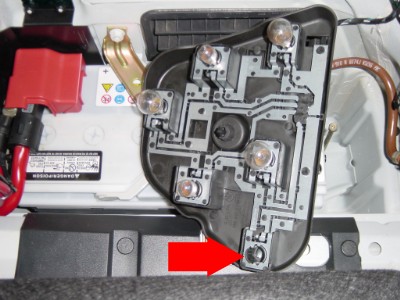
Step 1: Pop down the access panels on the sides of the trunk.
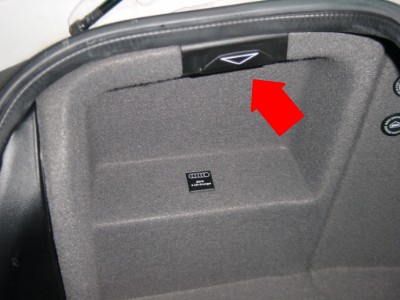
Step 2: Remove the lamp assembly by turning the knob and gently sliding it back.
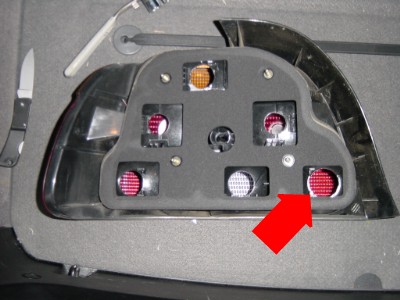
Step 2: Insert fog light into the open spot.
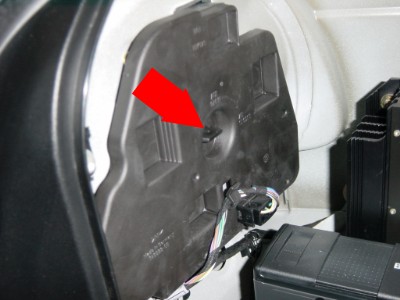
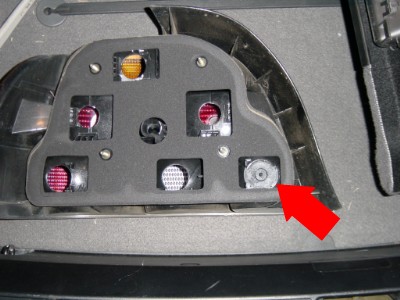
Step 3: Remove the four nuts and slide off the rear lens assembly.
Step 4: Break out the circular fog light plugs. A good method is to place a screw driver along the perimeter of the plug and tap it with a hammer until all of the pieces are broken out.
Step 5: Turn the lens assembly upside down and shake out the plastic bits.
Step 6: put it all back together.
Phase 2: Fog light wiring
This will take time, patience and will probably result in a few minor nicks and curses by the time you get through. Wear gloves when removing or replacing panels. Wiring needs run from the left rear lens to the right rear lens, from the right rear lens to the right side of the dash, and from the right side of the dash to the fog light switch. You need to take apart seemingly everything between. Turn on some music and take your time.
Step 1: disconnect the battery by removing the negative cable from the battery terminal. Leave it disconnected until finished with all of the electrical work.
Step 2: Prepare 2 15' lengths of wire. Run one wire through the appropriate pin in the left lamp connector and solder it to a connector (61-13-1-376-202). Repeat on the right side with the other wire. Since there are 2 blank pins in each connector, the correct pin can be deduced by ruling out the blank pin position on the lamp assembly side.
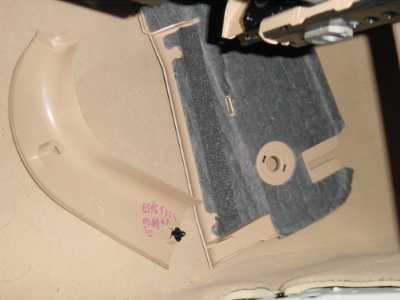
Step 3: Remove the black plastic panel against the back of the trunk where the trunk latch is. Pull up the 4 grommets with a screw driver and then lift out the panel.
Step 4: Run the wire from the left lens to the right lens wiring harness, following the original wiring harness, threading it through existing tie downs and securing it at intervals with electrical tape.
Step 5: Remove the center headrest by pulling it up.
Step 6: Remove the back seat bottom. Give the bottom cushion a good pull up on each side to unclip it.
Step 7: Remove the back seat top. Remove the 2 nuts located at the bottom near each door. Then pull the seat upward. You need to pull the seat high enough to clear the clips past their enclosures which are visible at the base.
Step 8: Move away the right hand felt panel in the trunk located forward from the battery by pulling up the grommet. Run the wires through the insulation to the back seat. This for me was very tedious and time consuming since it is over 1 foot of invisible space that needs navigated. I eventually got it through using a straightened coat hanger.
Step 9: This concludes the work needed in the trunk so it is a good time to put everything back together in the trunk.
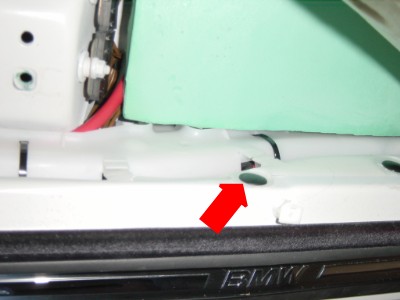
Step 10: Remove the front passenger seat. Use a torx wrench to remove the 4 screws that hold the rails to the floor. Move back the seat to get at the front two. Move the seat forward and remove the plastic covers to gain access to the back two. Next unclip the tensioner. Now move the seat away from the right side of the car so you can access the conduit beneath the carpet next to the center pillar. Caution: the seat is very heavy. Be careful not to accidentally scrape anything with the rails.
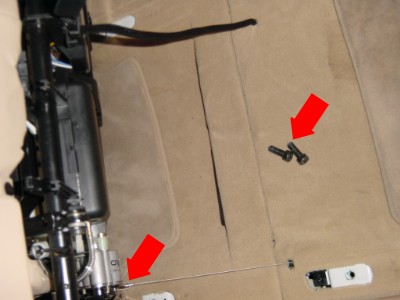
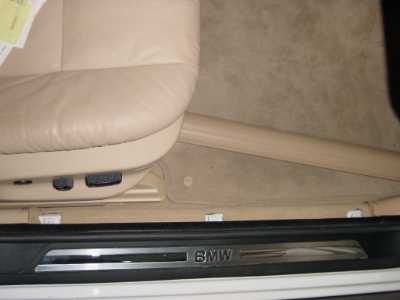
Step 11: Slide off the kick panel next to the back right door.
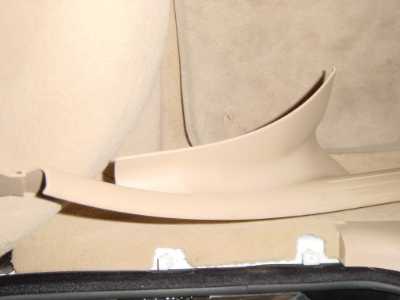
Step 12: Yank off the center pillar between the front and back seat.
Step 13: Yank off the kick panel next to the front right door.
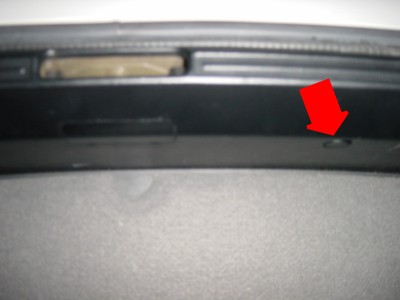
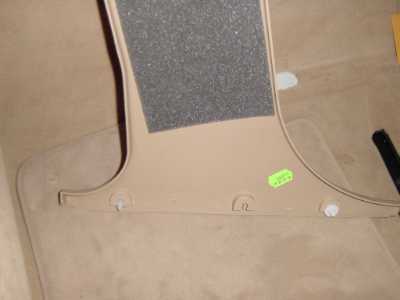
Step 14: Yank off the kick panel under the dash. Next, remove the panel under the dash by putting a finger in the circular hole and pulling it forward.
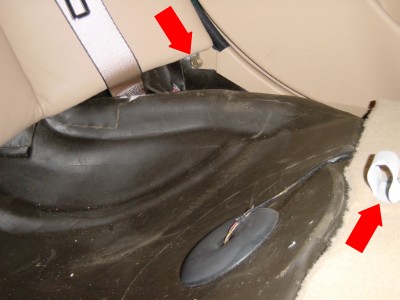
Step 15: Pull back carpeting and locate the white plastic conduit running between the front and back seat. Pull grommets from the conduit. Pull out the green Styrofoam piece. You may need to take the bolt off the black plastic cover inside the green Styrofoam to loosen it.
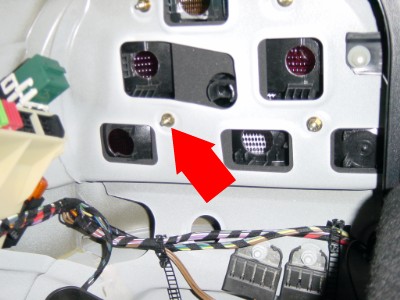
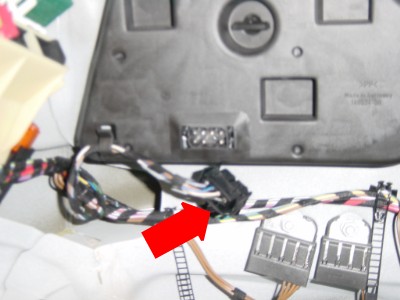
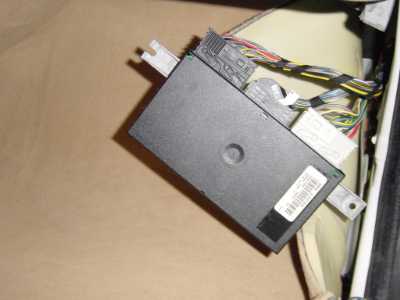
Step 16: Peel back carpet under the right side of the dash and pull down the lamp control unit (LCU). There is a single bolt below it.
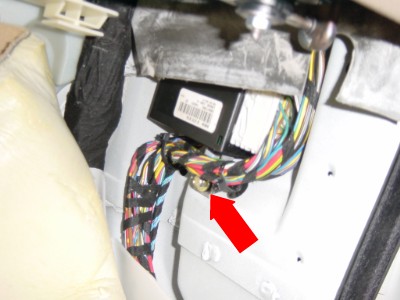
Step 17: Run the two fog light wires from the back seat to the LCU. Be thorough as always--run the wires through existing tie downs, conduit, and wrap with electrical tape at intervals. You want the fit and finish to match your BMW and do not want rattles.
Step 18: It is a good time to put everything back together except beneath the dash. To put some of the kick panels back, first pull out the grommets if they stayed stuck in the car. You will know which ones.
Phase 3: Fog light switch wiring
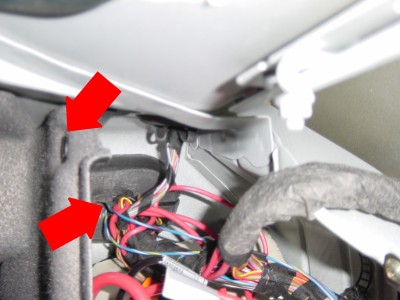
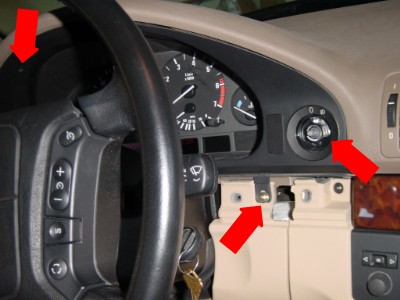
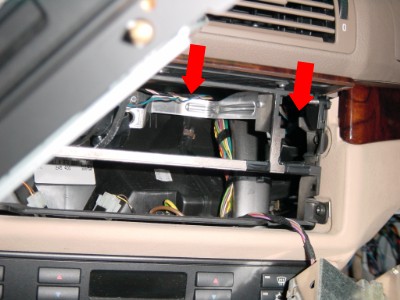
Step 1: Pull the knob off the fog light switch. Remove the two wood trim pieces below the instrument cluster. They slide out. Remove the instrument cluster cover. There are 3 torx screws along the upper rim facing downward plus 3 screws behind where the wood trim was.
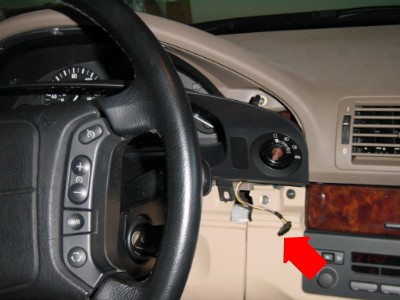
Step 2: Remove the nut on front of the fog light switch. Change the switch and dial with the new parts and replace the nut. Insert a contact (61-13-0-006-663) into the blank pin of the fog light switch connector. In order to insert the contact, the connector must first be opened. Open it by sliding away the cover horizontally (perpendicular to the wiring direction).
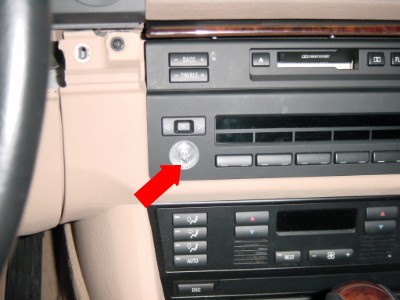
Step 3: Remove the computer panel (also known as the MID). Pull off the volume control knob. Turn the torx bolt under the volume control knob counter clock wise as far as it goes (about 1/4 of a turn). While the torx bolt is turned, pull on the volume control shaft with pliers. The computer will swing out.
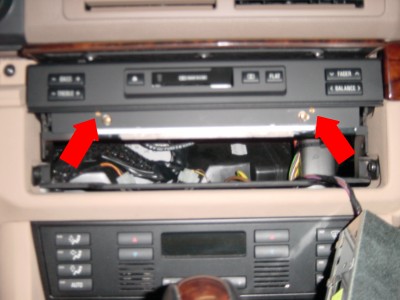
Step 4: Remove the tape player. Loosen the two brass allen wrench bolts near the bottom and pull the tape player forward.
Step 5: Remove the glove box. Pull off the clips on either end and slides forward and out.
Step 6: Lower the fuse box above the glove box. Turn the two two white knobs and it lowers.
Step 7: Run the wire from pin 45 of the LCU to the fog light switch. Follow the existing wiring harnesses and use wraps of electrical tape to secure it at intervals. To get it from the left side of the glove box to the right side of the tape player area, I used a straightened coat hanger.
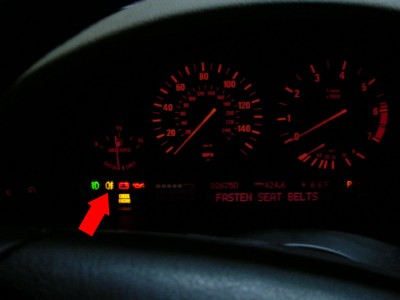
Step 8: Connect the battery and test. When the rear fog lights are on, a yellow indicator lights up in the dash.
Step 9: Put everything back together and enjoy.
Credits
Primary credit goes to the legendary Jim Cash who pioneered the rear fog light retrofit. Credit also goes to the early adopter SVTWEB who added more details to the process. Thanks to Dave Rodziewicz for adding model year 2001 information. Finally, credit goes to www.bimmer.org for allowing effective dialog among BMW owners. If you have any comments or recommendations on this procedure, feel free to contact me at paul@jadeturtle.com.